
Spotlight seasonal menus or promotional products with our 'Special Availability' feature that enables categories to be available to order for specific date ranges. Calendar moments are the biggest drivers of online sales. Increasing order volume by up to +200% and delivering larger basket spends.
This feature not only allows you to promote special day items in advance but also gives you full control of when a category is live and orderable by your customers. When the date range you have selected expires, the category will be automatically hidden so you don't need to worry about fulfilling accidental orders.
Advantages:
- Products or packages can automatically go online and offline
- Run multiple dates ranges across multiple categories simultaneously
- Stops accidental orders for the wrong days
- Supports better promotional planning
- Locks-in orders ahead of time
- Promotes a better team and customer experience
Special Availability per location setup
You have the option to make a category available in one of your stores while excluding it from the others.
Here are the steps:
Create a new [Category] *if you already have the products and category created, please skip to STEP 4.
1. Go into your Products tab, from your Slerp controls dashboard then select [Categories] button
2. Select [Add category]
3. A small box will come up where you can add the name of your new category, type the name then click [Save].
4. After creating your category, navigate to the "Locations" section. Click on the specific store.

5. Navigate to the "Inventory" tab. From there, you have the option to select either "Same-Day" or "Pre-Order." After making your choice, proceed to the "Special Availability" tab.

6. Click the "Create Special Availability" tab.

7. Click the dropdown arrow to choose a category. Click the calendar icon to pick the start date.

8. Click on the day you want to enable or disable, and if needed, you can click "Clear" to start over.

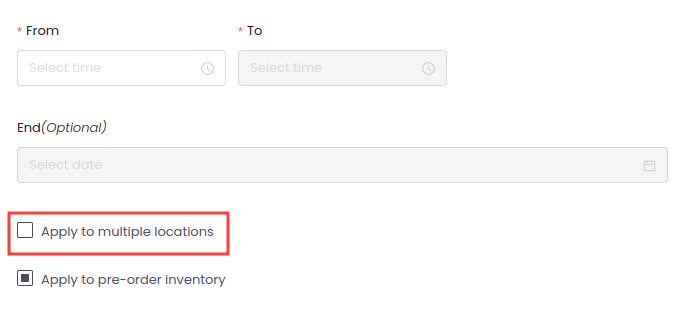
9. Select the desired time range for when you want the category to be available, specifying the start and end times. Setting the end date is also possible, although it's an optional step.
Additionally, you can click on "Apply to pre-order inventory" to avoid the need to repeat the process for pre-orders.
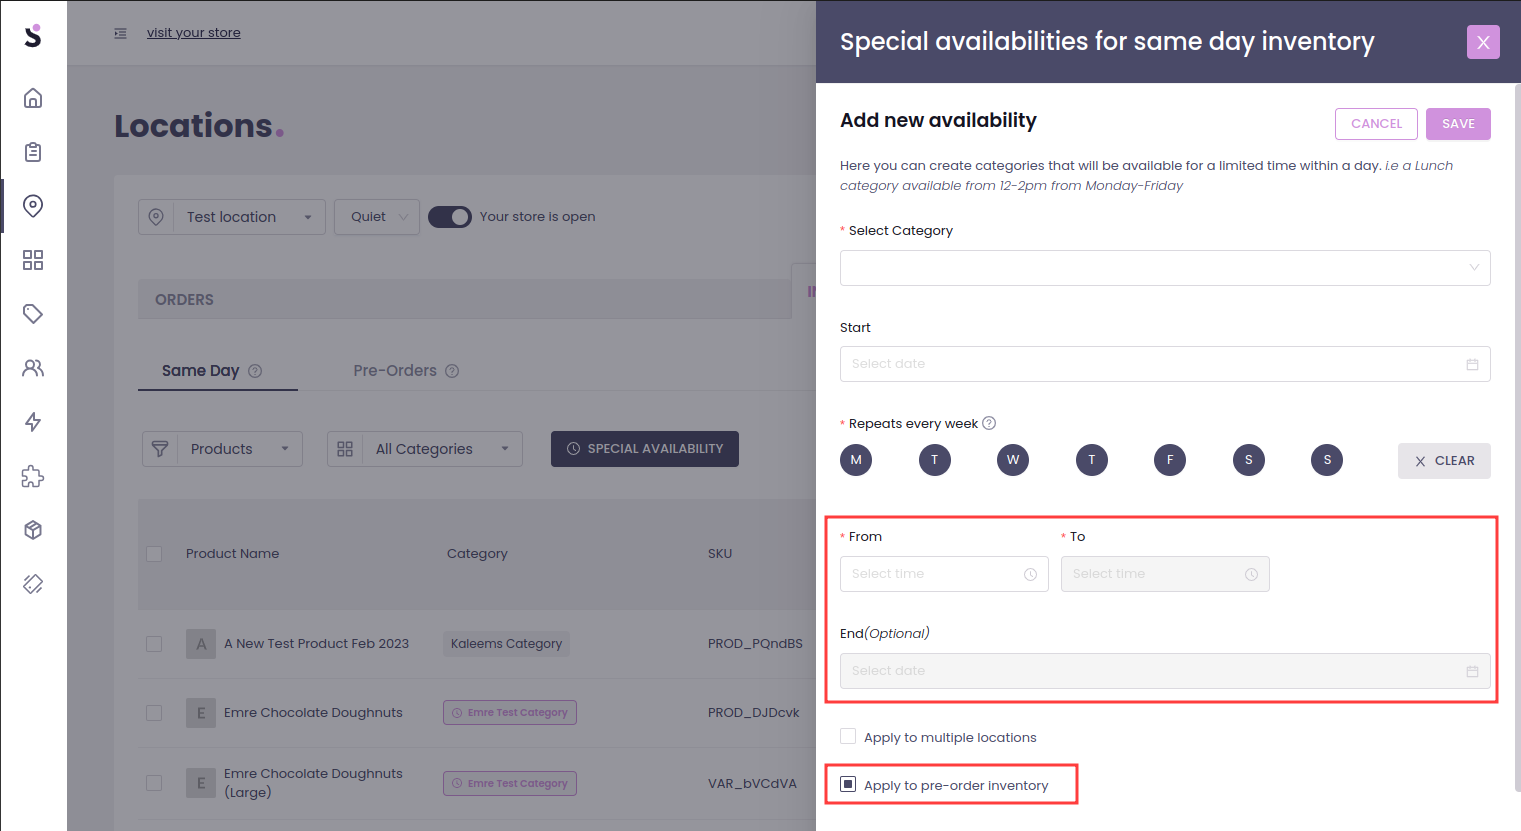
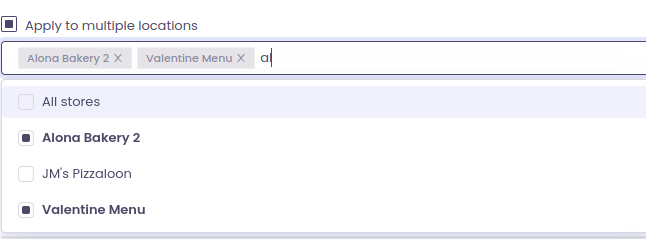
10. If you would like for this schedule to be applied to more than one location, you can select the "Apply to multiple locations" box:
- By default, this will add the schedule to all stores, but you have some options to customise the selection:
- To clear an individual store, click on the "x" next to the store name.
- To clear the selection, click on the "x" to the right of the locations pane:
- Select stores by clicking on the store name in the popup window:
- Filter the selection by typing in the name of the store (This can be any part of the store name)
- To clear an individual store, click on the "x" next to the store name.


11. Then, click "Save".

12. To view, you can click on the "Special Availability" tab again. Additionally, you have the option to edit or delete as desired.
